US
USQ&A: What Do I Need for Winter Hiking?

When you grow up in New England, you know a thing or two about the cold. We like to say that it’s not truly cold until you take a breath, and your snot freezes in your nostrils. It’s not unusual on a January morning for the thermometer to read 18 degrees below zero (-18° F).
To me, the cold is old news – I grew up in the White Mountains Region of NH. Warm jackets, insulated shoes, and layering were engrained in me from a young age. I’ve lived in this weather all my life, and I’ve been hiking in it for almost as long. Hiking is my favorite activity, and I’m lucky enough to have easy access to amazing trails year-round. In fact, winter is probably my favorite time to be out in the mountains.
Winter hiking is a truly magical experience – when being on the trail feels akin to being inside a snow globe or stumbling into Narnia under the reign of the White Witch. That increased beauty is not without increased risk, but it’s a risk that, with some preparation, you can account for. Here’s some common winter hiking questions I hear, and my tips on how to be prepared.
What is winter hiking?

Depending on where you live, winter hiking may look quite different. In some regions, winter hiking could just mean hiking in cold weather – the temperatures are down relative to the rest of the year, but there’s no snow and ice.
How I’m going to define winter hiking – and how I’ll be answering the rest of these questions – is different. When I say winter hiking, I mean not only are the temperatures cold (let’s define “cold” as below 40° F), but also that trail is covered in snow and ice.
Do your research for the area you’re hiking in; even the timing of “winter” looks different region to region. If you’re hiking anywhere in New England, for example, you should anticipate snow, ice, and biting cold, beginning as early as October, and lasting as late as June.
Can you go hiking in the winter?
Absolutely! Winter is my favorite time to hike, for many reasons, but to name a few:
- Trails are typically less crowded, so you can enjoy more quiet time and solitude out in nature.
- The views are stunning, on the summit and on the trail. I don’t think you can top the unique, almost alien beauty of mountains in snow. From strange ice crystal patterns on the trail to frosted boulders and snow-covered trees… there are no words.
- Deep snow softens the trails – a trail that’s typically a scramble over rocks and boulders becomes a smooth (though steep) snow road. Descents that were hard on your feet and knees become soft and way lower impact.
- It’s cold! Nothing demotivates me like humidity and heat, while nothing motivates me to hike faster than the need to generate warmth, so I tend to hike faster and suffer less in the winter.

So yes, with the proper know-how and gear, many of the trails and mountains you love hiking in the summer will turn into whole new paths to explore once snow falls.
Before you head out though, check trail conditions: after snowfall, some trails may become inaccessible due to seasonal road closures. There’s nothing more disappointing than realizing you can’t even make it to the trailhead, because it’s 5 miles down a now-closed road.
Is winter hiking dangerous?
Yes, winter hiking is inherently dangerous. Any time you head into the backcountry, summer or winter, hiking or kayaking, you have made a decision to take on more risk than if you stayed at home. And winter hiking is undeniably more dangerous than its summer counterpart.

Just because winter hiking is dangerous does not mean you shouldn’t do it – but as with all risk, you should be aware of the dangers and prepare for them before choosing to participate. Here’s a few added risks to winter hiking:
- Fewer people are on the trails – if you need help, you are less likely to have someone come along and assist.
- Days are shorter – with sunset happening earlier (as early as 4 pm where I live), if your hike takes longer than you anticipated, you’re much more likely to get stuck in the dark.
- Ice and snow on the trails – a summer stream crossing becomes a treacherous, slippery ice path. The trail blazes on the trees marking your path are obscured by snow, while signposts can be completely buried under feet upon feet of snow. Winter hiking increases your chances of losing your way or your footing.
- Avalanches – depending on where you’ll be hiking, avalanches may be another danger. Another reason to do your research ahead of time.
- Colder temperatures – hypothermia and frostbite claim lives and limbs in my area every winter. I don’t say that to keep you from hiking, but to drive home how important this last point is – however cold you think you’ll get, there’s a strong likelihood it will be colder.
What do I need for winter hiking?
Think of your must have winter hiking gear as a variation of your standard hiking gear. Start your packing list with all the items you’d normally take hiking – the 10 Essentials are a great place to start. From there, build in these additional items:
- Traction – you always want shoes with good tread when hiking, so you don’t slip on the rocks and roots of the trail. For winter, that tread needs an upgrade to deal with added slip risks of ice and snow. Depending on the trail conditions, the needed traction could look like microspikes, crampons, or snowshoes.
- Gaiters – some people use gaiters year-round to keep debris out of their shoes and socks. In winter, they help keep your lower legs and feet snow-free. I don’t use them on every hike, as some trails are packed down enough you don’t need them if you’re wearing taller boots, but they shine when the snow piles deep. Shoutout to neck gaiters too - they protect your face from the chill and wind.
- Insulating Layers – on summer hikes you pack a rain jacket in case of inclement weather or a light jacket for windy summits. Winter hiking takes clothing preparedness to a whole new level, as you’ll find yourself putting on/taking off layers more frequently.
- Emergency Blanket/Bivvy – I recommend keeping an ultralight, heat-reflective emergency blanket or bivvy in your pack year-round (you’ll typically see this included in the 10 Essentials list as “shelter”). However, that recommendation becomes much stronger for winter. With only a few ounces added to your pack, you can greatly increase your preparedness for that “it’s cold” risk.
- Thermos – this one’s optional, but I find nothing warms my insides faster than a hot drink. For me, that looks like a thermos full of hot cocoa or tea that I pull out on the summit. Not a must, but it sure tastes delicious.

Now that we’ve covered the basics at a high level, I want to touch on a few specifics in greater detail.
How do I stay warm hiking in the winter?
In my mind, the answer to staying warm is two-fold:
- Owning and packing the right layers.
- Wearing the right layers (and not wearing them) at the right time.
We’ve covered how to dress for hiking elsewhere, including layering, what it is, how to do it, and what materials to avoid. I won’t be reiterating those instructions here, but give them a read, so you have all the right layers in your pack. I will give a quick shoutout to some of my favorite winter hiking clothing items:
- Down Hoodies from Outdoor Research – warm, lightweight, and you can layer the hood over your hat to trap in all the warmth.
- Fleece Liner Gloves from LL Bean – I find my hands get hot hiking, and these liner gloves are super thin, just the right amount of warmth without making my hands sweaty.
- Gatewood Boot Socks from Darn Tough (similar men’s style here) – Boot height carries Merino Wool warmth further up my leg, and the Full Cushion adds warmth and plush.
Once you have part one covered, you get to part two. Knowing what layers to pull out of your pack and what layers to put back in your pack and when and where to do that takes some trial and error. There’s no golden rule, as your body may run hotter or colder than another person’s, the trail you’re on may have different transition points.
Here’s what I’ve learned from my experiences hiking in winter, which may be a good starting point.
Start cold
The car you parked at the trailhead is nice and warm, and you’re about to step out into the cold. Depending on where you parked, you might be stepping out into a bit of wind tunnel. The temptation to be warm when you step outside is understandable.

But… you step onto the trail, get a few yards into the trees, the wind disappears, and you start to sweat. Hopefully you’re wearing moisture-wicking base layers made with Merino Wool that can handle that sweat, but regardless, you haven’t been on the trail 5 minutes before you’re feeling a bit too warm.
I’m just getting into my rhythm… I’m not that warm yet… thus begins the mental debate of whether to stop and take a layer off or keep going just a few more minutes and keep sweating more and more, only for that sweat to turn to ice and that heat your body is generating to start backfiring on you as you get wet and cold.
Save yourself the inner turmoil and protect your warmth by choosing to be a bit cold, just for those first 5 minutes. My rule of thumb is however many layers I wish I was wearing at the trailhead; I should be wearing one less. If I don’t warm up 5 minutes in, I can put that layer on with confidence. But that rarely happens.
Remember you’ll get hot on the way up
If you haven’t experienced winter hiking yet, I might sound crazy for saying you’re going to be hiking through the snow in 20° F weather with a single layer on your upper body… but I’ve done it. Your body generates an incredible amount of heat while hiking, and sometimes even that single layer feels warm when I’m headed uphill.

Sure, my extremities might sense the chill – I can feel the cold air hitting my sweaty forehead, my body knows it is cold outside and I should be cold… but I’m generating enough sweat for it to be summer.
This is why layering is so important. You don’t want to be wearing all your layers hiking up, get overheated, soak them through, then freeze on the summit. Because when I stop, it takes maybe a minute for that veritable heat shield I’ve generated to start dissipating. Choose your base layers and next layer up with the amount of heat you typically generate in mind.
Time layering with changes in landscape

This tip’s harder to follow for new trails (again, research!), but generally speaking, a major change in the trail’s landscape is an ideal time to add a layer. Two examples:
You’re headed up a mountain where most of the trail is in the shelter of the trees, but the last mile is above treeline. When you see the tell-tale signs of the trees becoming thin, short, and stubby, pull out your next layer. Passing the treeline generally means a drop in temperature, and often introduces the wind, so putting that layer on right before you exist can save you a nasty chill. I typically put on my gloves and hat at this point, if they’re not already on.

Your trail has been winding along for a while, then takes a sudden left-hand turn, and what was a quiet (if effort-heavy) stroll uphill in a lovely calm becomes a wind tunnel. You can see the trail continue up relatively straight a long distance, and the wind’s blowing right at you. A good time to pull out a layer.
Remember you’ll get cold on the summit, and not as warm on the way down
It’s a regular occurrence for me to go from 1-2 light layers on my upper body to 4-5 layers when I reach the summit. Granted, I run hot, but my point is, there’s a lot of reasons you’ll get cold suddenly: you’ve stopped moving, you’re at a higher elevation, there’s a good chance you’re more exposed to the wind/elements.
Just like you don’t want to let your body heat get out of control on the way up, so start cold, I apply the reverse logic at the summit. Put those layers on before you start to get really, truly cold. Trap the heat your body’s starting to stop generating inside your puffy, to keep an envelope of warm air close.
No need to brave the cold, put on however many layers it takes for you to be comfortable. My personal experience is once you’re no longer going uphill, if you let yourself become cold, it’s nearly impossible to become comfortable again.
As you begin your descent, no doubt you’ll start taking layers off. I take off my bomber hat almost immediately after leaving the summit most hikes. However, I don’t just rip layers off. I find walking down hill generates way less heat, so instead of prematurely letting my warmth escape, I take off layers as I start to get just a bit too warm. Then I keep hiking, take another off just when I’m getting too warm, and repeat until I no longer am getting too warm, which typically still leaves me with 2-3 layers on.
Putting it all together
Here’s an example of how I put this process together to stay warm. This example is hyper-personalized to my cold tolerance, but the principles will translate to yours.
One of my favorite winter hikes is Mt. Jackson in the Whites. Parking is across the road and slightly down from the trailhead, and it never fails that short walk up the road is a freezing, blustery wind tunnel. But I know that, prep everything I can in the car, then blast as fast as I can (safely) across the road and into the trees. Cold, but the second I hit the trees I feel the temperature go up.
On the way up, I make few changes to my layers – I typically start with a base layer t-shirt with a long sleeve base layer over it (both Merino Wool). On a warmer winter day, that base layer may come off in the first 10 minutes, but on colder days it stays on.
The trail up Jackson is sheltered and direct 80% of the way. The trail also has super clear transition points – when you hit the super steep ascent that in the summer is a rock scramble, you’re transitioning into a more exposed area, I put on a mid-layer (typically a fleece).

When you’re 5 minutes from the top, you pop up out of the trees and take a sharp right over ice-laden rock slabs. From that point on, you’re completely out of the trees and in the wind. Before making that sharp right, I pull out another mid-layer, my summit hat and mittens, and my puffy. I might leave the puffy unzipped or the hat in my pack side pocket until I’m physically on the summit, but I have them ready to go.
Take in those views, then down we go – I trade out my summit bomber hat for a lighter weight hat and remove my mittens in favor of my liner gloves. Typically, by the time I’m back to the snow-covered rock scramble, I’m ready to take off my puffy and at least one mid-layer.
From there, it depends on the warmth of the day – I may leave everything on all the way to the bottom, but I’m likely to ditch the hat. Again, personal preference and awareness of your body’s cooling system go a long way. You may need a few hikes to figure out your perfect rhythm.
Can I use normal hiking shoes in winter?
There’s many variations on this question. E.g. Are trail runners ok? Are winter hiking boots necessary? Are my summer hiking boots enough?
In my experience, you need a waterproof shoe for winter hiking. Wet feet quickly become cold feet, and it only takes one misstep end up knee-deep in snow when you’re winter hiking. Your shoes are covered in snow, then you keep hiking and your feet melt the snow, and boom – wet feet. Merino Wool socks will keep insulating even when wet, because Merino’s amazing like that, but wet feet are still a recipe for blisters, and if they become too wet, a risk for frostbite.
The answer? Waterproof shoes. Personally, I always make those shoes boot height. My current winter hiking boots are the Revel IV High Polars from Keen, and they’re serving me super well. I prefer higher boots for the extra protection – no one wants snow down their boots.
Yes, you can wear gaiters to help prevent that from happening. In deep snow conditions, I use both and don’t at all find it to be overkill. If you choose to wear a low hiking shoe or boot (but still waterproof, right?), gaiters are a must in my book.

My two cents: not only should your shoe/boot be waterproof, but it should also be insulated. Your feet are your #2 asset when hiking, they deserve the best, and frostbitten toes are a real buzz kill. I wear insulated boots with midweight hiking socks, like the Hiker Boot, and my feet never get cold, even when the summit temps are below zero.
That said, Darn Tough does make thicker socks – the Mountaineer – and if you have a waterproof but uninsulated shoe, that sock might be a good bet. And if your feet run hotter than mine, you may find you don’t even need that.
If you’ve never winter hiked before, test your footwear and sock combination on a cold day by taking a long walk in your area.
Do I need snowshoes for winter hiking?

If you’re hiking popular trails, the likelihood is no, you don’t need snowshoes. That said, stay on the “monorail.” Trails that see lots of winter traffic get packed down, making snowshoes unnecessary… unless you take a step or two off trail in either direction. Then you may find yourself up to your knees in snow.
That said, if you’re the first one hitting the trail after heavy snowfall, you may need them. Or if you’re the type that likes to bushwhack or take the trail less traveled, you’ll want them. Wading through knee or even thigh-deep snow isn’t how I like to spend my hikes.
So no, you probably don’t need snowshoes. What you do need is traction. If I could give every hiker one piece of advice, it would be this: “Go buy a pair of microspikes. They’re not that expensive, and they will blow your mind with how much easier they make winter hiking. Plus, your chances of needing Search & Rescue to come save you drop by 80%*.”
(*I made this percent up. This is not a verified fact. That said, I have friends on Search & Rescue, and I’ve seen a thing or two in my years of hiking.)

Let me repeat myself. DO NOT go winter hiking without traction. I cannot tell you the number of people I pass on the trail every year, slipping and sliding around, hugging trees, and otherwise unprepared for the slippery conditions.
Do some of these people make it up the mountains? Yes. What they aren’t thinking about in their pursuit of the summit is that what goes up must come down, and descending those slippery slopes is so much more dangerous.
It's not worth twisting an ankle, spraining your knee, or breaking your neck. Not to mention, walking across ice wearing microspikes without a single slip is a strange power rush.
For the majority of winter hikers, microspikes provide the right amount of traction. If you plan to do a lot of above the treeline hikes where the ice gets thicker and slicker, you may need to upgrade to crampons. If your hikes are less scaling a mountain and more nature walks, you may be alright with ice cleats instead.
If you are wearing snowshoes, your traction is built right into the snowshoe, but you may still want a pair of microspikes so you don’t have to wear your snowshoes the entire hike, regardless of whether the snow depth requires them.
Can I use ski poles for winter hiking?
If you aren’t already using trekking poles for summer hiking, I recommend. And yes, you can use trekking poles for winter hiking – in fact I strongly recommend them for the added balance they provided. Having a 3rd or 4th leg comes in handy when crossing iced-over streambeds.
Trekking poles are designed for hiking – most of the time they’re collapsible, so you can easily stow them when not needed, and some variants have shock absorption. That said, yes you can use ski poles. My father has used the same ski pole for hiking for at least 20 years, and he has no regrets, as he always wants it in his hand, never stowed.
Can I wear contacts during winter hiking?
Yes! I wear contacts and have never had a problem wearing them winter hiking.
If you’ll be spending a night on the trail in freezing conditions, take the right precautions. If it’s an option for you, you can sleep with your contacts in. Keep your contact solution and contacts (if not in your eyes) in your sleeping bag with you so they don’t freeze overnight.

Whenever you’re overnight hiking with contacts, pack your glasses. If a contact tears, falls out, or otherwise is no longer usable, be prepared to hike out without them.
Questions?
Ask them! I love winter hiking – I hope what I’ve shared here helps you get out and enjoy the mountains this winter. And if you have questions, send them our way. Especially sock questions – those are our specialty.
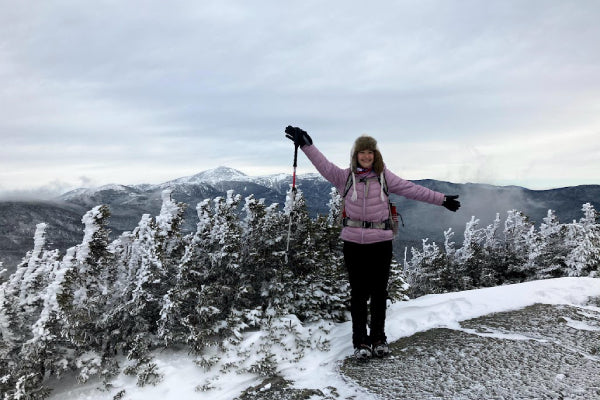
About the Author
Jenny Hastings fell in love with hiking from spending hours in the White Mountains with her dad, spending most weekends out on the trails. She's always looking for a new summit and ways to spend more time outdoors, whether on the trail or reading in her hammock.